UPS Configuration Page
- Step 1 - Need to have a your own UPS Account.
- If you need to create an account, click here to create a UPS account.
- Step 2 - Next you need to register for a UPS developer Account.
- Click here to register for a UPS developer's account.
- When registering, you will need your Account (shipper) Number from your UPS Account you created earlier
- Step 3 - Create an App in your UPS Developer Account.
- Log into your UPS Developer Account you created in Step 2, then Click on the Create App button.

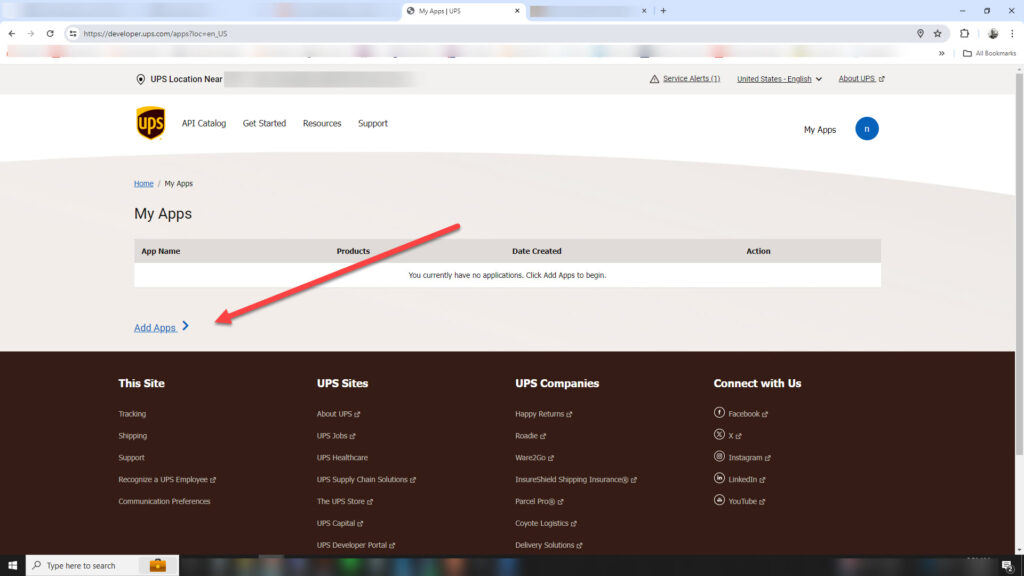
- Step 4 - Click on the Add Apps link

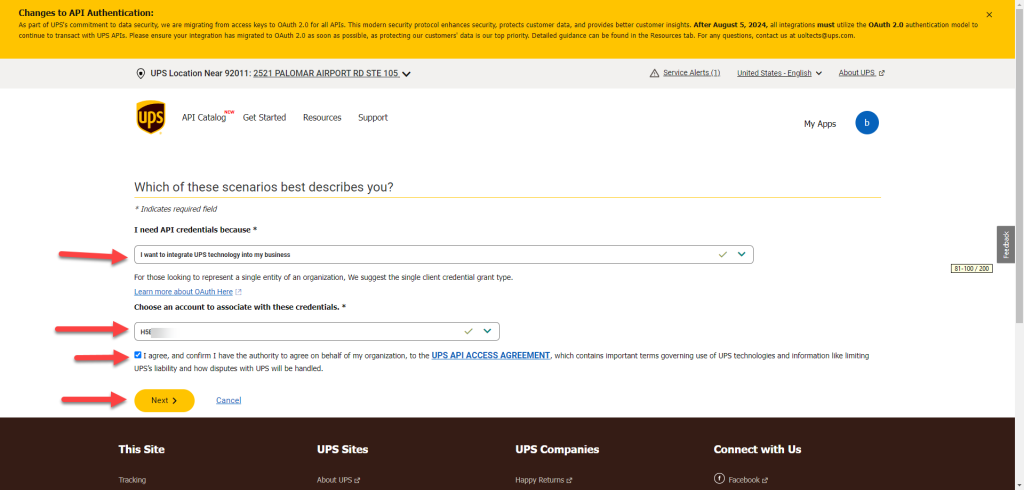
- Step 5 - On the screen shot below select the following:
- I want to integrate UPS technology into my Business
- Add an existing account
- Check the I agree statement, click the Add Account Button and follow the instructions to add an account to your app.
- For the call back URL you can use http://localhost:9099/

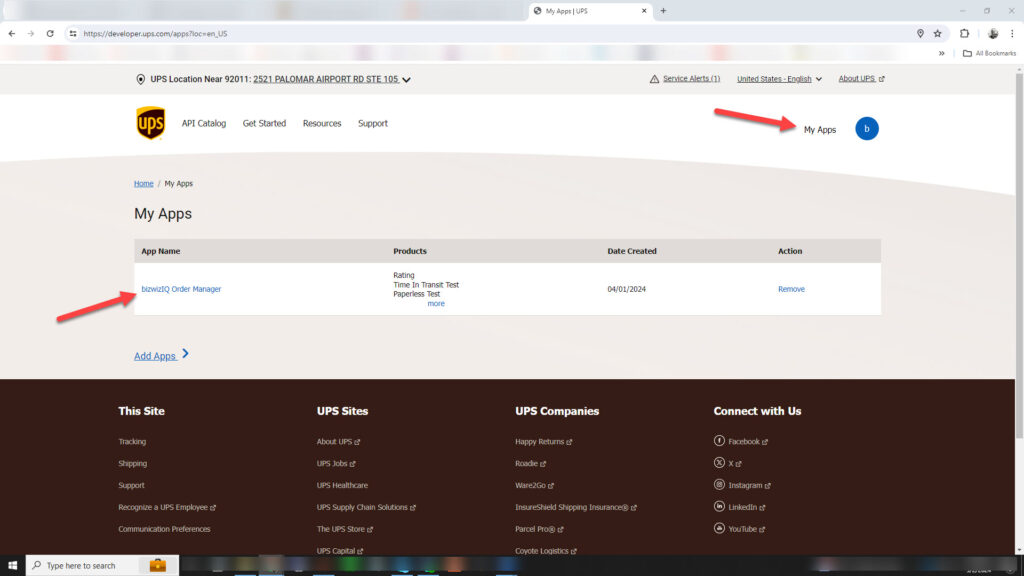
- Step 6 - If you are not logged in, login to your developer account again and click on the My apps link in the upper right area, then click on the App you just created

- Step 7 - On the screen below, click on the Add Products and add all the products that are available for those that use Order Manager. For ShopKart User at the very minimum you must add the following:
- Rating
- Authorization(OAuth)

- Step 8 - On the screen above, you will notice you have a Credentials section that will have your Client ID and Client Secret. You will need these two items to enter into your ShopKart website
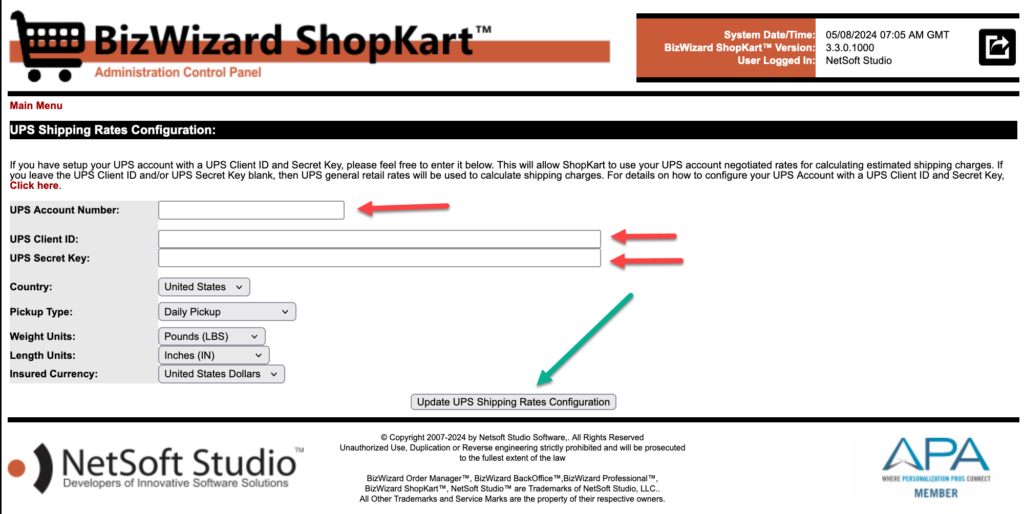
- Step 9 - Log into your ShopKart Administration Control Panel and from the Main Menu click on the UPS Shipping Configuration button. This will open the UPS Shipping Configuration window as shown below. Enter your UPS Account Number, UPS Client ID and UPS Secret Key. Then click on the Update Shipping Rates Configuration to save your changes

